Showing posts with label leftovers. Show all posts

Saturday, November 27, 2021

Bread Pudding (gluten free of course)

 What do you do when you make the Thanksgiving rolls too dark?? You turn them into bread pudding!


Gluten Free Bread Pudding

6 slices gluten free bread

3 T melted butter

1/2 C apples, diced

4 eggs, beaten

2 C Milk

3/4 c sugar

1 tsp ground cinnamon

1 tsp pie spice

1 tsp vanilla extract


Preheat oven to 350 deg.  Spray 9x13 pan with cooking spray, Tear bread into cubes and spread evenly on the bottom of the pan. Pour the melted butter over the bread. Sprinkle with apple pieces. Set aside.


In a medium bowl, whisk the eggs until whites and yolks are combined. Add in milk, sugar, spices, and vanilla extract. 

Pour the mixture over the bread evenly. Press down to make sure the bread is soaking up the liquids. 


Bake 45 min in the 350 deg oven or until the bread springs back when you push on it. Remove from the oven and allow to cool slightly. Top with vanilla sauce. 


Vanilla Sauce

1/2 C brown sugar

2 T Corn Starch

Pinch Cinnamon

1 egg

1 1/4 c Milk

2 T Melted Butter

pinch salt

For vanilla sauce, whisk 1/2 cup of light brown sugar, the corn starch, a pinch of cinnamon, 1 egg, 2 tablespoons of melted butter, 1 1/4 cups of whole milk, and salt together in a heavy saucepan until smooth. Heat over medium heat, whisking constantly, until thickened and the sauce coats the back of a spoon, 10 to 12 minutes. Stir in the vanilla extract. Pour sauce over warm bread pudding, or serve on the side in a bowl.


Friday, August 31, 2012

My secret for you: Re-heating pizza to make it new again


     Want to know a secret?? How about a secret that will forever change your life? I have one for you today. I'm going to teach you the secret way to re-heat pizza. It is life changing!! You will want to name your first born after me when you are done reading this......unless it's a boy.
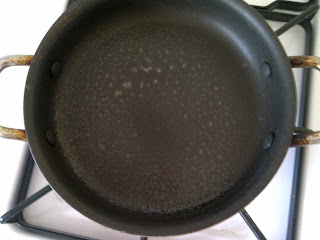
     We all hate soggy cold pizza. Soggy warm pizza comes in at a close second place. You put the pizza in the microwave and it comes out warm, but soggy crust. You re-heat it in the oven and it comes out overcooked and dry. ICK! So here is your life changing tip of the day!! You will need a skillet, piece of foil, and your cold pizza slice.
Place your slice into the pan. Turn the heat on very low and cover with foil.
The key is low flame and the foil to keep the heat in.
 
Check the pizza after 4 or so minutes to see if it is warm enough. You don't want to burn the bottom so be sure that heat is very low. Let the foil do it's job of keeping the heat in and warming the toppings while the direct heat from the burner crispies up your crust.
 

You know when it is warm because the cheese will get that shiny look to it, and of course it will feel warm to the touch. Once it is warm then serve immediately. You will never go back to putting pizza in the microwave again!

     I hope that you enjoy this life changing tip. I ONLY re-heat my pizza this way. I have this perfect little skillet and it is just the right size for one slice. The pizza tastes just like it did the night before (sometimes better) if you re-heat it this way. Enjoy!

-Jessica

Wednesday, April 11, 2012

Chili Cheese Dog Casserole - Gluten Free Style of Course!


     Do you ever have those nights where you have no idea what to make for supper? Well tonight was one of those nights for me!! I also have been trying to clean out the freezer a little so I decided to use up a few things that were taking up space.....leftover frozen chili, turkey hot dogs, and some Udi's bread that was starting to get ice crystals. Do you see where I am going with this one?? That's right...I made chili cheese dog casserole!!

Chili Cheese Dog Casserole -gluten free style

8-10 Hot Dogs, cut into chunks
8-10 Pieces of gluten free bread, torn into pieces
4 C. Chili
2 T. Mustard
2 C. Cheese

Pre-heat the oven to 350 degrees. Spray a casserole dish with cooking spray. Place the torn bread in the bottom of the dish. Top with the hot dog chunks. Top with 1/2 the cheese, then the chili. Bake for 15 minutes. Remove from the oven spread the mustard over the top and the remaining cheese. Bake for another 15 min. or until heated through and cheese is melted. Serve hot.

I heated my chili first because it was frozen. If you didn't have frozen chili you could use canned (Hormel is gf, but of course read the label because as soon as I post this info is out of date ha! )

Tear the bread into pieces

Start layering: Bread, hot dogs......
1/2 of the cheese

Chili and then bake for 15 min.
Remove from the oven and top with mustard and more cheese....back into the oven for 15 min. or until heated through and cheese is melted.


For a night where I had no clue what to cook I think it turned out great. The bonus was there is even some more space in my freezer!! I hope you enjoy this recipe.

-Jessica

Friday, January 6, 2012

Quesadillas: The perfect hiding spot for leftovers!

     I'm a fan of using up leftovers. However, sometimes I get tired of the original form that the food was so I re-invent it. I am a huge fan of quesadillas. I think that pretty much any leftover can go into a quesadilla and be made amazing again! I have even been known to make a meatloaf quesadilla before (and they are darn good).
    Last night I grilled out. I made some yummy steak and then used my grill pan and did shrimp, onions, and peppers. It all was so yummy!! However, I made WAY too much food. The great thing about that is that I now had shrimp and veggies for some shrimp quesadillas! YUM!

    Making quesadillas is NOT hard at all. You can vary the ingredients to suit your tastes and the ingredients you have in your kitchen. Here are the basics of what you will need:

Quesadillas

Corn tortillas
Cheese
your favorite leftovers or deli meat

Lightly spray a small non stick pan with cooking spray
Over medium heat: Add 1 corn tortilla and top with a small amount of cheese
Add your favorite leftovers
Top with a little more cheese and a 2nd tortilla
Lightly brown each side of the quesadilla. Cheese should be melted and insides should be warmed.


Cut in half or into 1/4's and serve warm.

Enjoy!

-Jessica


Wednesday, January 4, 2012

Everything But The Kitchen Sink Italian Pasta Salad


    I have been craving pasta salad for a while now. However, if you have been gluten free for long then you may have possibly had an experience with pasta salad. It doesn't always work out. However I have found that if you use the right kind of pasta for the job, then it holds up well and doesn't turn to mush. I have made some very successful pasta salads using Tinkyada brand pasta. This is pretty much the only brand of gluten free pasta that I will eat. The other stuff is just junk. (keep in mind I am NOT being paid to say this ha).
    I decided today that I was making some pasta salad. I really want a creamy sauced salad. So I decided I would make Italian pasta salad. I didn't really plan ahead for this recipe so that's why I am calling it "Everything But The Kitchen Sink". I just pulled ingredients out of the fridge that might work. I had some mini pepperoni, green pepper, mushrooms, block cheese, frozen peas, Italian dressing and of course pasta. You can use whatever you have in your fridge to make your own salad. It would be great with other ingredients too.
     So keep in mind my recipe isn't something that you need to stick to faithfully. If you are a huge fan of green pepper, then add more of that in. If you hate cheese then leave that out (but how could anybody hate cheese? Seriously, we can no longer be friends). Just put in your favorite things.

Everything But The Kitchen Sink Italian Pasta Salad

3/4 Pkg of Tinkyada Brown Rice Spirals, cooked according to package
3/4 Bottle Italian Dressing
3/4 C. Cheese diced into small cubes
1/3 C. Frozen Peas
1/3 C. Mushrooms, sliced
1/4 C. Green Pepper, diced
1/2 C. Mini Pepperoni

Cook the pasta according to the package instructions. Run the pasta under cold water when it is finished cooking. When pasta feels cool to the touch it can be added into the mixture with the rest of the ingredients.

Combine the pasta, Italian dressing and other ingredients in a large bowl. Toss to coat. Refrigerate for several hours before serving to allow the flavors to mix and mesh.

While the pasta is cooking prepare the other ingredients.
Add the cooled pasta with the veggies, dressing, etc.
Toss all of the ingredients to coat. Refrigerate for several hours before serving. That will allow the flavors to mesh.
Enjoy!!

-Jessica


P.S. On Pinterest I had ran across a idea that said that if you put a wooden spoon over a boiling pot it will NOT boil over. So I put their little idea to the test today.

The idea worked better than if there had not been a spoon over the pan. However I still had a little bit spill over. Soooooo don't rely on that little tip to save you from scrubbing the stove top! Pinterest fail!

Sunday, January 1, 2012

Pink Champagne Cake


     The New Year has been celebrated......the world didn't end over night (I heard a rumor that the Mayan calendar didn't go up to 2012 so we were all doomed ha, I guess we showed them. We survived the night). If you are like me and not much of a partier, you may have some leftover champagne. I had most of the bottle left. However, I knew that would be the case so I had been working on this awesome pink champagne cake recipe for you all! I like cake more than I like champagne anyways. Maybe I should resolve to eat more cake?
    
Pink Champagne Cake

1 1/2 C Sugar
1/2 C Butter (at room temperature)
4 eggs
2 C Gluten Free Flour Mix
1/2 tsp. Salt
1 T. Baking Powder
1/2 tsp. Xanthan Gum
1 C. Pink Champagne
1 tsp. Vanilla Extract

Pre-Heat oven to 350 deg. Line the bottom of two 8 or 9 in. round cake pans with wax paper. Generously spray the pans with cooking spray.

In a large mixing bowl, beat the butter and sugar until light and fluffy. Add eggs one at a time. Mixing completely before adding in the next egg. Add flour, salt, baking powder, xanthan gum, champagne and vanilla extract. Beat on medium-high speed for 1 minute.

Pour half of the batter into each of the two prepared pans. Bake for 20-25 min. in a 350 deg. oven or until a toothpick inserted in the center of the cake comes out "clean".

Remove from the oven and allow cakes to cool in the pan for about 10 min. Use a knife to go around the edge of the pan to loosen the cake. Turn the cakes out on a wire rack to finish cooling. Remove the wax paper from the cake.

Place one cake layer on a pretty plate or platter. Top the layer with 1 cup or frosting or jam. Place second layer on top of the first. Spread frosting over the rest of the cake.

Pink Champagne Frosting

1 C. Champagne
1/2 C. Butter (1 stick)
1/2 C. Shortening
4 C. Powdered Sugar

Place 1 cup of champagne in a small saucepan. Simmer over medium-high heat until reduced to 3 tablespoons.  Allow to cool.

In a bowl using a mixer, cream softened butter, shortening, and powdered sugar together. Once the frosting is thick and fluffy, pour in the reduced 3 tablespoons Champagne and mix well.
The first thing that I did was start the champagne reduction for the frosting. 1 C Champagne reduced to 3 T.
While the champagne was reducing I mixed up the cake.
Mix, Mix, Mix
Divide the batter evenly into two 8 or 9 in. round pans.
Mix the frosting while the cakes cool.
Place the first cake on a pretty plate
Smear Jam, preserves or frosting over the first cake layer. Don't go clear to the edge if you are using jam or preserves.
Place the 2nd layer on top of the first.
I usually start frosting the top.....no particular reason why :)
Frost the top and sides of the cake.
I used the tines of a fork and made some designs on the top.


This cake is amazingly good. However, it is super sweet so invite some friends over to help you eat it!! Wishing you all the best in 2012!! Happy New Year USASillyYaks!

-Jessica