Showing posts with label gluten free. Show all posts

Saturday, November 27, 2021

Bread Pudding (gluten free of course)

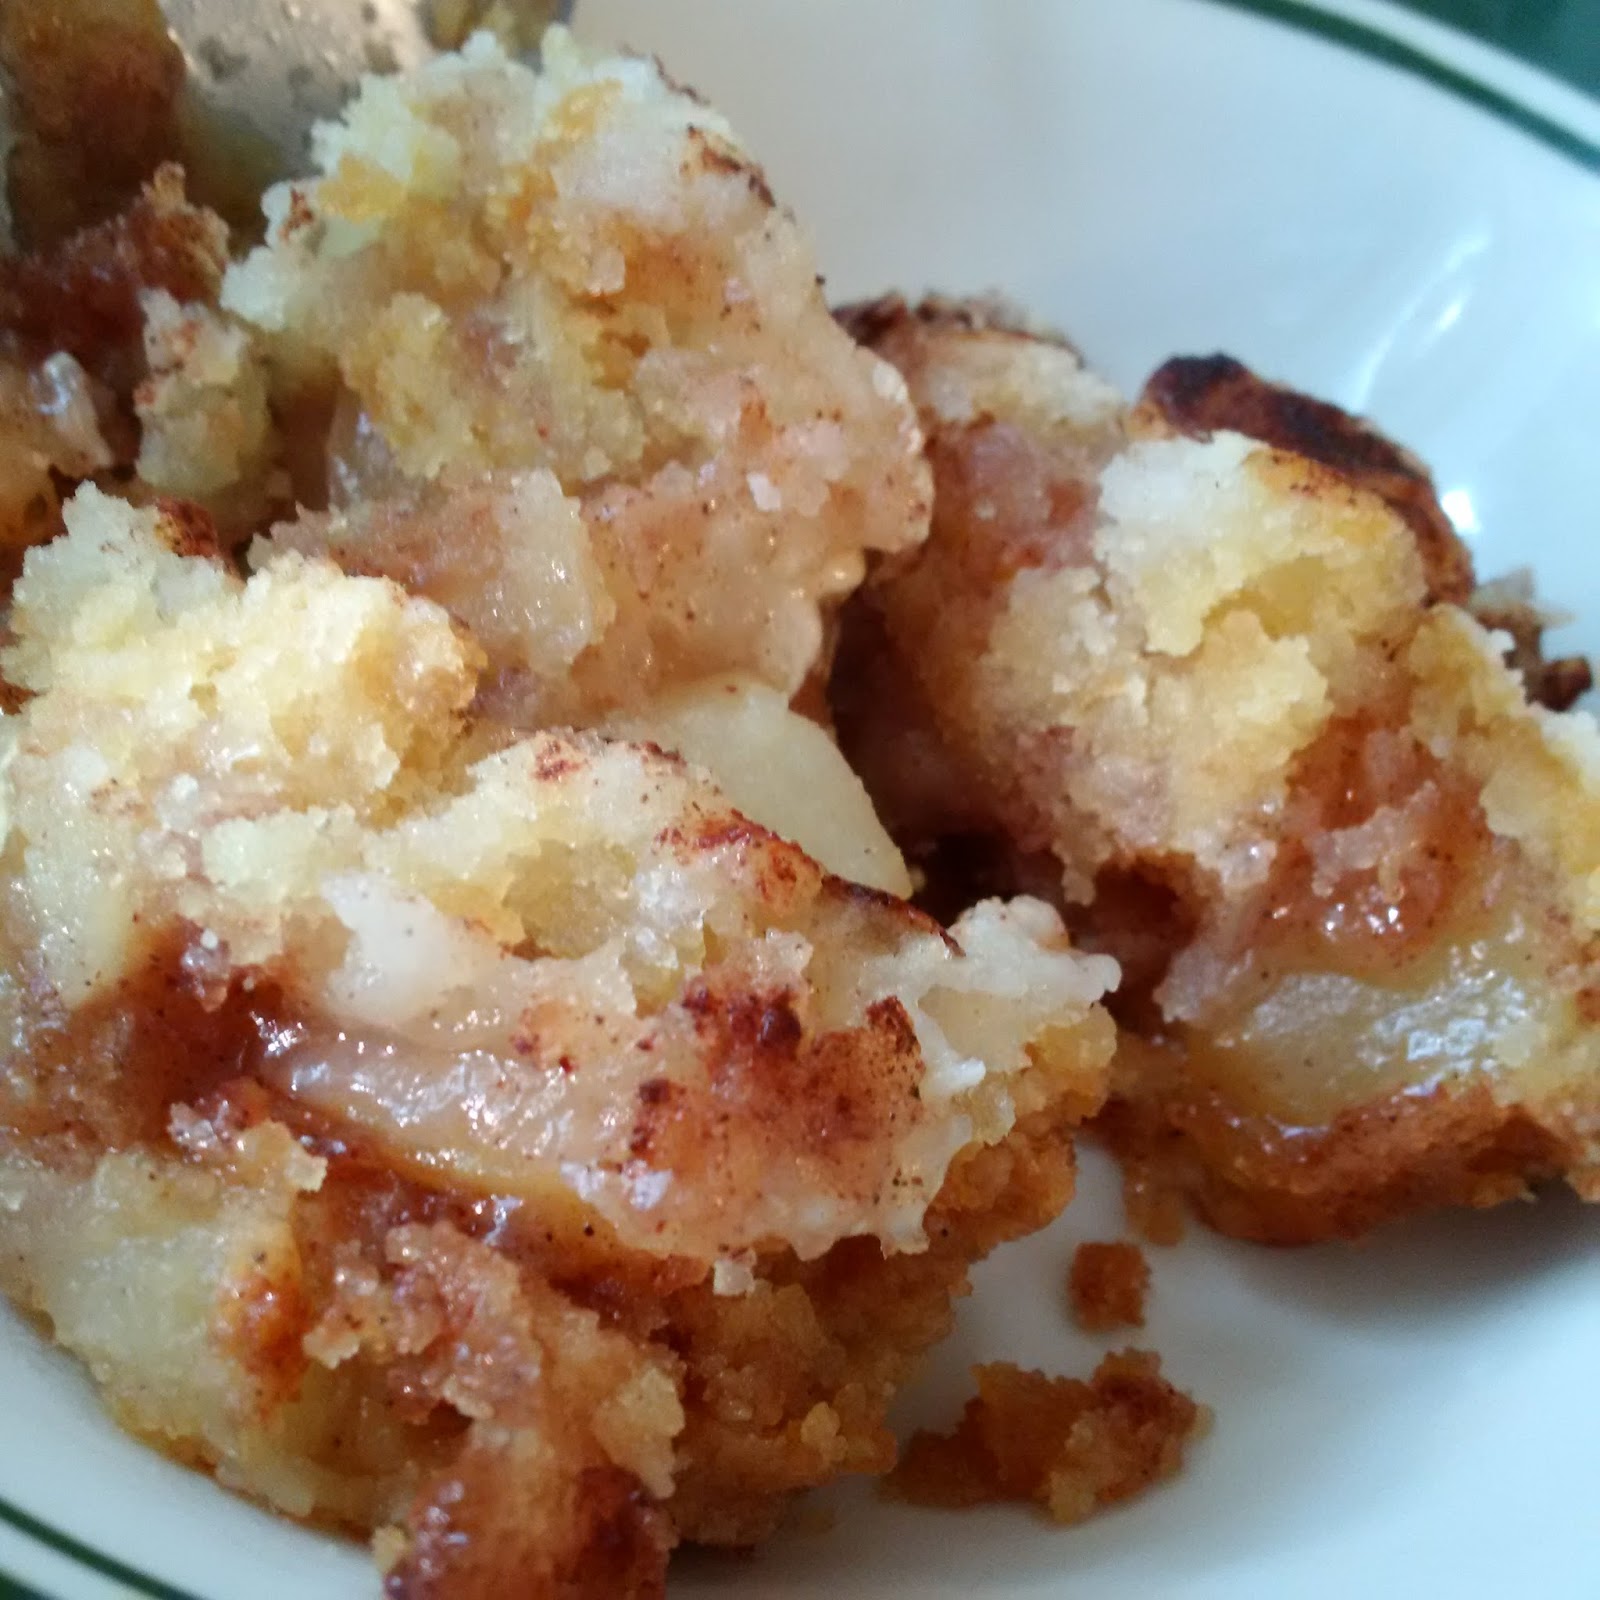
 What do you do when you make the Thanksgiving rolls too dark?? You turn them into bread pudding!


Gluten Free Bread Pudding

6 slices gluten free bread

3 T melted butter

1/2 C apples, diced

4 eggs, beaten

2 C Milk

3/4 c sugar

1 tsp ground cinnamon

1 tsp pie spice

1 tsp vanilla extract


Preheat oven to 350 deg.  Spray 9x13 pan with cooking spray, Tear bread into cubes and spread evenly on the bottom of the pan. Pour the melted butter over the bread. Sprinkle with apple pieces. Set aside.


In a medium bowl, whisk the eggs until whites and yolks are combined. Add in milk, sugar, spices, and vanilla extract. 

Pour the mixture over the bread evenly. Press down to make sure the bread is soaking up the liquids. 


Bake 45 min in the 350 deg oven or until the bread springs back when you push on it. Remove from the oven and allow to cool slightly. Top with vanilla sauce. 


Vanilla Sauce

1/2 C brown sugar

2 T Corn Starch

Pinch Cinnamon

1 egg

1 1/4 c Milk

2 T Melted Butter

pinch salt

For vanilla sauce, whisk 1/2 cup of light brown sugar, the corn starch, a pinch of cinnamon, 1 egg, 2 tablespoons of melted butter, 1 1/4 cups of whole milk, and salt together in a heavy saucepan until smooth. Heat over medium heat, whisking constantly, until thickened and the sauce coats the back of a spoon, 10 to 12 minutes. Stir in the vanilla extract. Pour sauce over warm bread pudding, or serve on the side in a bowl.


Sunday, October 24, 2021

Crispy Cheddar Chicken gluten free of course

 Crispy Cheddar Chicken


2 lbs chicken tenders or 4 large chicken breasts 
2 sleeves gluten free Ritz style crackers 
1/8 teaspoon pepper 
3 cups cheddar cheese, grated
1/2 teaspoon paprika 
1/4c parmesan cheese 
1tsp garlic powder
Crush crackers. If using chicken breasts and not tenders, cut each chicken breast into 3 large pieces. Pour the cheeses and cracker crumbs into 2 separate small pans. Toss the garlic powder, paprika and pepper into the cracker crumbs and stir the mixture around to combine. Dip each piece of chicken into the cheese Press the cheese into the chicken with your fingers. Then press the cheesy coated chicken into the cracker crumbs and press it in.
Spray a 9×13 pan with cooking spray and lay the chicken inside the pan. . Cover the pan with tin foil and bake at 400 degrees for 35 minutes.


Saturday, March 21, 2020

No Yeast Gluten Free Rolls


We are in an odd time in our world right now with the Corona/Covid-19 virus. Grocery store shelves are near empty or empty. I saw this recipe going around on Facebook and thought I would give it a try with gluten free flour. It was meant for regular gluten filled flour.

In using the gluten free flour my product turned out more biscuit like and needed a longer baking time (so I have added that on my recipe for you). They were flaky, not fluffy like a dinner roll. However, still very good. Just don't expect the light fluffy roll texture..... I can't wait to use one for a breakfast sandwich in the morning.

No Yeast Rolls (gluten free)

1 C Gluten Free Flour Mix
1 tsp Baking Powder
1 tsp Salt
1/2 C Milk
2 T Mayo

Mix together and spoon into a muffin tin (makes 5-6 rolls). Bake at 350 deg. for 15-20 minutes.

Sunday, July 17, 2016

Glazed Lemon Blueberry Zucchini Bread


Glazed Lemon Blueberry Zucchini Bread

Ingredients
  • 2 cups gluten free flour
  • ½ tsp. salt
  • 2 tsp. baking powder
  • 2 eggs
  • ½ cup canola oil
  • 1⅓ cups sugar
  • 2 TB lemon juice
  • 1 cup buttermilk
  • zest of 1 lemon
  • 1 cup grated zucchini
  • 1 cup fresh blueberries
Glaze ingredients:
  • 1 cup powdered sugar
  • 2 TB lemon juice
  • 1 TB milk
Instructions
  1. Mix flour, salt and baking powder in a medium bowl and set aside.
  2. In a large bowl, beat eggs. Then add oil and sugar until well blended. Add lemon juice, buttermilk, lemon zest to this mixture and blend all together.
  3. Fold in zucchini & blueberries until mixed well.
  4. Add dry mixture to the wet mixture and blend all together until well combined.
  5. Pour batter into greased 9x5 loaf pan.
  6. Bake at 350 for 45-60 minutes.
  7. While still warm, make glaze and spoon over the bread. Let the glaze set up before cutting and serving.


Monday, June 6, 2016

Taco Spaghetti


I had run across a similar recipe on Facebook. I added a couple things. I subtracted a couple things. This is MY yummy version.


Taco Spaghetti

Ingredients:

•1 tablespoon olive oil
•1 pound ground chicken (beef or turkey work too)
•1 sm. onion, diced
•1 (1.25-ounce) package taco seasoning
•1 (10-ounce can) Ro*Tel® Mild Diced Tomatoes & Green Chilies
•8 ounces tomato sauce
•8 ounces gluten free spaghetti (cook according to package & drain)
•1/2 cup shredded cheddar cheese


Directions:

1.Heat olive oil in a large skillet over medium high heat. Add ground chicken and onion and cook until it has browned, about 3-5 minutes, making sure to crumble the ground chicken  as it cooks; stir in taco seasoning. Drain excess fat.
2.Stir in Ro*Tel®, tomato sauce, & spaghetti.  Cover, reduce heat and simmer, about 13-16 minutes.
3.Remove from heat and top with cheese. Cover until melted, about 2 minutes.
4.Serve immediately


Sunday, October 11, 2015

Easy Peasy Apple Dump Cake

Fall is here! That means comfort food to me. I love it when my house is warm from the oven being on & the smell of cinnamon filling the house.....ahhh! This recipe is easy & fits the season perfectly.

Easy Peasy Apple Dump Cake

Ingredients 

3C. Diced apples (about 4 large apples)
1/3 C. Sugar
2T. Lemon Juice
1 Box yellow gluten free cake mix
1Tsp. cinnamon
1/2 tsp. Pie Spice
1/2 C. Buttermilk (1tsp lemon juice to regular milk as a substitute )
8 T. Butter thinly sliced or grated


Directions

Pre-heat oven to 350 deg. Spread the apples over the bottom of a 9x13 pan that has been sprayed with cooking spray. Toss apples with sugar, spices, lemon juice, & 2T. of cake mix. Top with butter & remaining cake mix. Pour buttermilk over the top & sprinkle with extra cinnamon if you wish. Bake at 350* for about 35-45 minutes until the top is slightly golden and the apples are hot and bubbly. Serve with vanilla ice cream for extra yumminess.

Dice apples & place in bottom of pan
Toss apples with sugar, spices, lemon juice, & small amount of cake mix
Top with butter, remaining cake mix, buttermilk, & sprinkle with cinnamon 
Cook until apples are tender & cake is fluffy & golden


Saturday, April 18, 2015

Pound Cake (gluten free)


Ingredients
2 cups sugar

1 cup Butter, melted

4 Eggs

4 teaspoons vanilla

3 cups Gluten-Free Flour

2 teaspoons baking powder

1 cup milk

Directions

Pre-Heat oven to 350°F. Grease 12-cup Bundt or 10-inch angel food cake (tube) pan; sprinkle with gluten-free flour. Set aside.

Combine sugar and melted butter in bowl. Beat at medium speed, scraping bowl often, until creamy. Add 1 egg at a time, beating well after each addition. Add vanilla; beat until well mixed.

Stir together gluten-free flour and baking powder in bowl. Gradually add flour mixture alternately with milk to butter mixture, beating at low speed until well mixed.

Pour batter into prepared pan. Bake 50-60 minutes or until toothpick inserted in center comes out clean. Cool 10 minutes; remove from pan.


Serve with strawberries & whipped cream

Sunday, March 29, 2015

Gluten Free Wacky Cake (No Eggs, Milk, Or Butter)


This type of cake was made popular during the Great Depression. Families were rationed. They made the best with what they had available.

Gluten Free Wacky Cake (No Eggs, Milk, Or Butter)

Ingredients
  • 1 1/2 Cups flour + 3 Tablespoons (all-purpose)
  • 1 Cup white sugar
  • 1 tsp. baking soda
  • 1/2 tsp. salt
  • 1 tsp. white vinegar
  • 1 tsp. pure vanilla extract
  • 1 tsp. pure almond extract
  • 5 Tbsp. vegetable oil 
  • 1 Cup water 
Directions
Preheat oven to 350 degrees F.

Mix first 4 dry ingredients in a greased 8" square baking pan, starting with the flour first.  Mix well. Make 3 depressions in dry ingredients - two small, one larger. Pour vinegar in one depression, vanilla and almond extracts in the other, and the vegetable oil in third larger depression. Pour water over all.  Mix well until smooth.

Bake on middle rack of oven for 35 minutes.  Check with toothpick to make sure it comes out clean. Cool.  Top with your favorite frosting 

Tips:
You can double this recipe, just use a 9x13 baking pan.

You can also mix the batter in a bowl for neater, easier mixing.  Be sure to follow the directions the same way - mixing the dry ingredients then making the depressions for the wet ingredients.  Don't forget to grease you pan. 


Other Flavor Options:

Vanilla: 
Use 2 tsp vanilla extract instead of the vanilla/almond
Lemon:
add 1 Tbsp lemon zest & substitute 1 tsp lemon extract instead of almond 
Chocolate:
add 3 Tablespoons cocoa powder & omit almond extract
Make 2 small wells & 1 larger well
Add liquid ingredients to the wells
Mix until smooth 


Saturday, February 28, 2015

Slow Cooker Breakfast Casserole


 This recipe is easy peasy! It also happens to be easily adaptable & yummy!


Slow Cooker Breakfast Casserole

  • 1 package (30 ounces) frozen shredded hash browns (O'Brien are best for added flavor )
  • Meat of your choice 1lb. approximately  (diced ham, cooked crumbled bacon, or Sausage, cooked and drained)
  • 1 medium onion, chopped


  • 1 medium green pepper, chopped
  • 1-1/2 cups (6 ounces) shredded cheddar cheese
  • 12 eggs
  • 1 cup milk
  • 1/2 teaspoon salt
  • 1/2 teaspoon pepper


  • Directions

    1. In a greased 5- or 6-qt. slow cooker, layer half of the potatoes, meat(sausage, ham, bacon), onion, peppers, and cheese. Repeat layers. In a large bowl, whisk the eggs, milk, salt and pepper; pour over top. Cover and cook on low for 7-8 hours or until eggs are set. The center should measure 160 degrees .  Yield: 12 servings

    *my niece doesn't do dairy well so I used her milk in the recipe & omitted the cheese from the recipe. I served the cheese on the side for a topping for those that could have it. It worked great!

    Wednesday, August 27, 2014

    Cherry Pecan Banana Muffins


    Cherry Pecan Banana Muffins
    1 cup granulated sugar
    1/2 cup unsalted butter, softened
    2 eggs
    1 cup mashed super-ripe bananas, usually 3-4 medium bananas worth
    1 tsp. vanilla extract
    2 cups gluten free flour
    1 tsp. baking soda
    1 tsp. salt
    1/3 cup toasted chopped pecans
    1/2 cup maraschino cherries, drained well, chopped
    Preheat oven to 350 degrees F.  In a large mixing bowl, using an electric mixer, cream sugar with butter until light and fluffy; add eggs, one at a time and beat well.  Add bananas and vanilla and beat again, making sure batter is well combined.  In a small bowl, combine flour, baking soda, salt, pecans and cherries.  Using a spatula or large spoon, gently fold the flour mixture into the banana mixture, just until ingredients are barely combined.  Don’t over mix!  Divide batter between 12  well-greased muffin tin cups and bake, uncovered, for approx. 20 minutes or until muffins are golden brown and spring back to the touch on top.  Remove from oven and place muffin tin onto a cooling rack.  Remove from muffin tin and store in an air tight container.
    Makes 12 fat muffins

    Sunday, December 15, 2013

    Better Than A Ride In Santa's Sleigh Christmas Poke Cake


    Better Than A Ride In Santa's Sleigh Christmas Poke Cake

    1 Betty Crocker Devil's Food GF chocolate cake mix, baked according to the directions on the box. (except, bake in a 9x13 pan. Cake will be thinner, but better for the  recipe)
    1 cup peppermint dairy creamer (Coffeemate is gluten free)
    14.5 oz sweetened condensed milk
    1 jar hot fudge sundae sauce
    1/4 cup peppermint dairy creamer
    1 cup crushed Gluten Free Oreo type cookie  
    8 oz Cool Whip
    Andes Peppermint Chips for topping (approximately 1 1/2 cups) (yep they are gluten free)
    Crushed gluten free Oreos for topping (approximately 1 cup)

    Instructions
    1. Once the cake has cool, use the bottom of a wooden spoon to poke LOTS of holes in the cake.
    2. In a small bowl, whisk together the sweetened condensed milk and 1 cup of the peppermint Coffeemate. Pour over the cake, trying to fill in the holes.
    3. In the same bowl, whisk together the hot fudge sundae sauce and 1/4 cup peppermint Coffeemate. Mix in 1 cup crushed GF chocolate sandwich cookies .
    4. Pour and spread the fudge mixture over the cake as evenly as possible.
    5. Spread the cool whip over the fudge. Sprinkle on the Andes candy bits and crushed cookies  (as much or as little as you want).
    6. Refrigerate for 4-6 hours, until the sweetened condensed mixture has soaked into the cake and it's thoroughly chilled. Cut and serve.

    This is SO yummy!!! Enjoy!

    Sunday, November 10, 2013

    Almond Coffee Cake


    I came to make a blog post today but had to clean the cobwebs & dust off the blog first. It has been a while since I have posted! Goodness!
         I tried this new coffee cake recipe today, so I thought I would share. I hope you like it.

    Almond Coffee Cake

    Cake Batter
    1 stick butter, softened
    ½ sugar
    3 large eggs
     1 tsp. vanilla extract
    1 tsp. almond extract
     2 cups Gluten Free flour
    1 tsp. baking soda
    1 tsp. baking powder
    2 tsp. xanatham gum
     2/3 cup orange juice
    1. In a bowl, beat together butter and sugar until well blended. Add egg, beat well after each egg. Add vanilla and almond extract .
    2. In a separate bowl, Mix together Flour, baking powder, baking soda and xanthan gum.
    3. Add flour to egg mixture a little at a time alternating with orange juice.
    4. Prepare Streusel topping now.
    Streusel Topping1 cup firmly packed brown sugar
    1 cup sliced almonds
    ¼ cup gf flour
    3 TBL. Butter melted
    1. Mix brown sugar, almonds and Flour with a fork. Add butter
    2. Spoon half of batter into prepared tube pan.
    3. Sprinkle streusel topping generously over batter.
    4. Spoon remaining batter over topping. Do not stir. This will give a nice layered effect.
    5. Sprinkle the rest of the topping on top.
    6. Bake in preheated oven at 350 for 45-50 minutes. Transfer to cooling rack. Cool completely.
    7. Turn Cake onto cake plate when completely cool.
    8. Make Glaze and drizzle over cake.
    Glaze
    ½ cup confectioners sugar
     1tbsp. orange juice
    Mix with wire whisk.

    Monday, August 5, 2013

    Better Than Sex Chex Mix.....heaven in snack form!


    Better Than Sex Chex Mix

    8  cups Chocolate Chex® cereal (1 box)
    3/4  cup packed brown sugar
    6  tablespoons butter or margarine
    3  tablespoons light corn syrup
    1/4  teaspoon baking soda
    1  cup Reese's Peanut Butter Cups, MINI size
    1 cup mini Hershey Kisses
    1 cup Snickers Bites
    1 cup MINIATURE marshmallows
    1/2  cup caramel bits
    1 Tbsp heavy cream
    1/2  cup MILK chocolate baking chips (or more if you wish)
    1/2  cup vanilla (white) chocolate baking chips
     
    Into large microwavable bowl, measure cereal; set aside. Line cookie sheet with waxed paper or foil.
     
    In 2-cup microwavable measuring cup, microwave brown sugar, butter and corn syrup uncovered on High 1 to 2 minutes, stirring after 1 minute, until melted and smooth. Stir in baking soda until dissolved. Pour caramel mixture over cereal, stirring until evenly coated. Microwave on High 3 minutes, stirring every minute. Spread on cookie sheet. Cool 10 minutes. Break into bite-sized pieces.
     
    Make sure Chex mixture is cool to the touch (so candy doesn't melt.) Evenly sprinkle mini peanut butter cups, Snickers, Kisses and miniature marshmallows over Chex mixture.
     
    In small microwavable bowl, microwave caramel baking bits and cream uncovered on High about 1 minute or until chips can be stirred smooth. Use a spoon or fork to drizzle over snack. Microwave the milk chocolate baking chips next, starting with 20-seconds and stirring, then at 20 second intervals until the mixture is completely smooth (microwave temps vary, so watch the chocolate and stir frequently until it's of drizzling consistency). Drizzle over the snack mixture. Then microwave the vanilla (white) baking chips in 20-second intervals, stirring until smooth, and drizzle that over the snack mixture. (Note: The vanilla and milk chocolate chips should not need cream added.)
     
    Refrigerate until set. Break apart and store in tightly covered container.
     
    Enjoy!!
    -Jessica

    Friday, May 24, 2013

    Almond or Lemon Poppy Seed Muffins, Gluten Free of course

    So I have been CRAVING poppy seed muffins. I couldn't decide between lemon or almond so I just made both. I made this recipe and split the batter in half then added the extracts and so I have 1/2 lemon and 1/2 almond. They are SO good. Total fix for my craving! They remind me of my gluten filled days and being able to eat those huge gluten filled Otis Spunkmeyer muffins from the grocery store. This recipe is a pretty darn close gluten free replacement for those........I hope you enjoy them too! 

    Almond or Lemon Poppy Seed Muffins, Gluten Free of course

    1/4 cup butter, softened
    1/4 cup vegetable oil
    1 1/4 cups sugar
    2 eggs
    1 1/2 cups sour cream
    1/3 C. Milk or Almond Milk
    1/2 teaspoon salt
    3 teaspoons almond extract or Lemon if you are making Lemon Poppy seed                                   
    1 teaspoon baking powder
    1/2 teaspoon baking soda
    1/2 teaspoon xanthan gum
    1/2 teaspoon vanilla
    2 1/3 cups gluten free flour
    2 tablespoons poppy seeds
     
    Mix flour, salt, baking soda, xanthan gum and baking powder in a bowl and set aside.
     
    In mixing bowl beat softened butter, oil and sugar until blended. Add eggs, vanilla, almond extract (or lemon extract), milk and sour cream to butter and oil. Blend until mixture is smooth, all moist ingredients should be blended well. Start adding the flour mixture to batter a little at a time until thoroughly blended but do not over mix.
     
    When mixed, remove from mixer and add poppy seeds. Stir with a spoon until completely mixed through. Place in muffin cups sprayed with cooking spray, filling to 3/4 full. Bake in preheated 375 degree oven for 20-25 minutes. Check muffins with a toothpick. Do not over bake. 

    -Jessica

    Saturday, February 16, 2013

    Chocolate Cake with Peanut Butter Frosting

        
         In complete honesty, this is all about the icing. The cake it just something to put this peanut butter icing on....because it's just not socially acceptable to sit and eat icing by the spoonful. At least not out in public! :) There is nothing that goes better with peanut butter than chocolate...so I made chocolate cake.....from a box.....that I amped up a little.  Chocolate Cake 1 Betty Crocker Devil's food Gluten Free Cake Mix1 C. Buttermilk2 Eggs 1/2 C. Margarine, melted1/2 C. Applesauce1/2 C. Milk Chocolate Chips Combine the above ingredients and bake according to the instructions on the box (350 deg. for 30-40min). Frost a cooled cake with the peanut butter frosting.
     
    Amazing Peanut Butter Frosting
     
    1/4 c. butter, softened
    1/4 c. cream cheese, softened
    1/4 c. peanut butter
    3 tbsp milk
    2 c. confectioner’s sugar

    Cream together the first three ingredients and then gradually add sugar and milk until you reach desired consistency, The milk can be left out for a stiffer icing, or if the milk makes the icing too thin, additional sugar can be added. Spread on cooled cake.

    I hope you enjoy this cake. I can see this frosting recipe going on some brownies, cuppeycakes, and maybe even cookies in the future. YUMMERS!

    -Jessica

    Tuesday, January 1, 2013

    Ten Years have flown by

        
         Ten years ago yesterday I sat in a doctor's office and was told I had Celiac. So New Years Eve the world always helps me celebrate my gluten free anniversary. Pretty cool eh?
         It really doesn't seem like it has been that long. I guess that is because we are forever learning and reading labels. We will never really be "pro" at this! ha Companies are constantly changing things on us. Though I don't feel as lost today as I did that very first day.
         I do feel like things have really changed in those ten years. When I was first diagnosed gluten free was not as mainstream as it is today. There were very few restaurants that had gluten free menu items. I had to mail order or order online my cake mixes and pastas. To see "gluten free" on a label was few and far between. Now we are able to walk into many restaurants with gluten free menus. Regular grocery stores are carrying gluten free items. Big companies are finally "getting it" and labeling their brands as gluten free when they are. I'm thankful for these changes!
         In June of 2004 I started the USASillyYaks yahoo support group. I did this because there were no people near me who were gluten free. I went online to find support and get ideas. That group has grown and has people from all over the world.
         October 20,2011 I decided to give blogging a try. I wanted a permanent place to share my recipes, information, and product reviews. I have really enjoying blogging. It is fun to see what recipes people LOVE and what recipes people could have done without! ha I haven't had as much time lately to post to my blog and I have really been missing it.
         In November of 2011 I was featured in an article in the magazine All You about autoimmune disorders. That was pretty exciting for me. I was excited to get to share my story to a larger group of people. I know that I made an impact because I had people contacting me via facebook and email who felt lost and alone before they read the article. I'm glad I did that article.
         December 2011 I decided to take USASillyYaks to Facebook. I feel like I have been able to share more and help others through expanding to Facebook. We have a great group of followers there.
         I have had some great opportunities to help others in the last 10 years. I hope to continue helping others and staying healthy. I can't wait to see what the next 10 years brings. Thank you for being a part of my journey.

    -Jessica
        

    Sunday, December 2, 2012

    Cheezy Chicken Tortilla Soup


          A co-worker recently brought in this amazing smelling soup for her lunch. I requested the recipe because it smelled SO good. I was excited to give the recipe a try. You know me though...I just can't make a recipe "as is". I have to make it my own. ha So I added more cheese, and spices, and tomato, and black beans......well you get the idea. I changed it! It is super yummy! I hope you like it too.

    Cheezy Chicken Tortilla Soup

    1 32 oz. Box of Chicken Stock.
    1 14 oz. Can Petite Diced Tomatoes
    1 10 oz. Can Rotel (mild)
    1 8oz. Can Rotel Tomato Sauce (mild)
    3/4 tsp. Coumin
    1/8 tsp. Black Pepper
    2 T. Minced Onion
    1/4 tsp. Chili Powder
    1 package (2-3) Chicken Breasts cooked and diced
    1 can Black Beans, drained and rinsed.
    8 oz. Velveeta
    1/2 C. Shredded Cheese

    Combine all of the ingredients (except velveeta, beans, and shredded cheese) and simmer for 1-2 hours. Add Velveeta, beans, and shredded cheese stir until melted completely and simmer for another 30-40 min.  Serve over tortilla chips.

    This soup is SO good and would also be great for putting in the crock pot! I can't wait to take my leftovers for lunch tomorrow!! YUMMERS!

    -Jessica

    Lemon Bars....Oh My Goodness!!

     
        This recipe is one that my Mom always made when I was growing up. These are a favorite of mine. Well really anything lemon that she makes is a favorite of mine! ha This recipe was easily converted to gluten free when I was diagnosed. I just switched out the flour in the crust to gf, and switched the flour in the filling to cornstarch to thicken the filling. YUMMMMM!! I had to share one of my favorites with you today! Enjoy!


    Lemon Bars - Gluten Free Style

    Crust:
    1 C. Softened Margarine
    1/2 C. Powdered Sugar
    2 C. Gluten Free Flour
    1/2 tsp. Xantham Gum

    Filling:
    4 Eggs, beaten
    6 T. Lemon Juice
    3 T. Corn Starch
    2 C. Sugar

    Combine the ingredients for the crust. Press into a 9x13 in. pan sprayed with cooking spray. Bake at 350 deg. for 15-20 minutes.

    Combine the ingredients for the filling mixture and pour over the warm crust. Return to the oven and bake at 350 for 25-30 minutes. Sprinkle with powdered sugar while warm.

    I hope that you like them as much as I do! -Jessica

    Saturday, November 10, 2012

    How to survive the holidays while gluten free.....

        
         Holey cow the holidays sure are sneaking up on me!! Last I looked it was summer and I was enjoying my flip flops and sunshine. Somehow it has turned colder, the days are shorter, and it's time to think about holiday foods.
         The holidays are tricky times for those of us who have to eat gluten free. Gluten is hiding everywhere and food is more than plentiful this time of year. Everyone is having a family dinner, work get together, holiday celebration with friends, cookie samples at the store...you get the picture..everybody is forcing food at you! ha It is hard because not everyone understands why you don't just eat ONE of Aunt Betty's cookies, or a little of their world famous chicken and noodle soup (you can just pick out the noodles can't you? haha (no you can't for anyone who is confused)) We have all had the food pressure from people and you just have to stand your ground. It's what is best for your health.
         I find that this battle is easiest when you are prepared. You have done your research. You have cooked ahead of time. You have brought your own plate of food to the dinner. You have baked a dessert that is safe for you. You tucked a bag of snacks in your purse "just in case". Planning ahead is key to getting through the holidays safely.
         I do battle with the holidays by cooking my own meal and taking a plate to dinners. I usually bring a dessert to share with everyone.  That way I am able to enjoy a meal with family and friends without being sick in bed following. I sometimes even find out what is being served and make a gluten free version of the meal so that I'm not eating tacos when everybody else is having roasted turkey.
         I have even started buying the supplies for my Thanksgiving dinner. It seems that right before turkey day some things are nowhere to be found on store shelves....things that are KEY to making my turkey day dinner. SO I have stocked up on poultry seasoning (key ingredient in my dressing recipe), corn meal (also key for the dressing), boxes of broth (they were on sale this week!!). I'm planning on getting my turkey next week.
         I talked a little about this on facebook today. You want to be sure that you get a gluten free turkey. It seems so silly that gluten would be in a turkey...but it happens. Lame, right?!?! They like to pump turkeys full of junk to make them juicy and tasty and sometimes that involves gluteny grossness. So be sure to read the label on your bird before you put it into your shopping cart. I like to buy Honeysuckle White brand turkeys. They clearly label them as gluten free and they are a yummy moist juicy bird. I snapped a picture of the packaging today while I was grocery shopping so that you would know what to look for.......this is where you say thank you to me for looking like a weirdo taking a picture of the frozen turkeys in the crowded store!
    Honeysuckle White Turkeys clearly state gluten free on the label...love that!!
    If you look closely you can see that it says "No Preservatives, No gluten, No msg"
     
         So the key to surviving the holidays is planning. You absolutely have to plan ahead. Otherwise you will end up eating something that you will regret. I have several Thanksgiving recipes already posted on the blog from last year. They are tested to be yummy and safe. Look them up and give them a try...I don't think you will be disappointed.
     
    -Jessica


    Wednesday, October 24, 2012

    Sinfully Easy Caramel Nut Brownies

     
        I made these brownies for work this week and they were a HIT! I had one co-worker (who is not gf) ask for the recipe and tell me these brownies were "better than sex". I'd call that a successful recipe!! I hope you enjoy them too!
     
    Sinfully Easy Caramel Nut Brownies
    1 box of your favorite gf brownie mix (follow the directions on how to mix it up)
    1 2oz package of chopped pecans
    1 11oz Bag of Kraft Caramel Bits (or you can buy the caramels you have to unwrap as well, these are just faster!)
    1 to 1 ½ C. Milk Chocolate Chips
    Pour 2/3 of brownie batter into your 9x13 pan sprayed with cooking spray. Spread the caramel bits evenly over the batter, then the nuts, and chocolate chips. Top with the remaining 1/3 of the batter. Bake according to the package instructions. You can top with a little melted frosting or melted chocolate chips or melted caramel to make them look nice.
     
    Your favorite gf brownie mix and a few simple ingredients make this amazing!!
    Mix your favorite gf mix according to the directions on the box. I used a Heartland Gourmet Brownie Mix.
    Place 2/3 of the batter into the pan, top with caramel, nuts, and chocolate chips. Top with remaining batter and bake according to box directions.
    Look at that ooey gooey amazingness!! SO GOOD!
     Top with melted chocolate or melted frosting and/or caramel to finish off the sinfulness! Enjoy!!
     
    -Jessica